
How to Add Social Media Links to Your Blog in 5 Easy Steps
Introduction
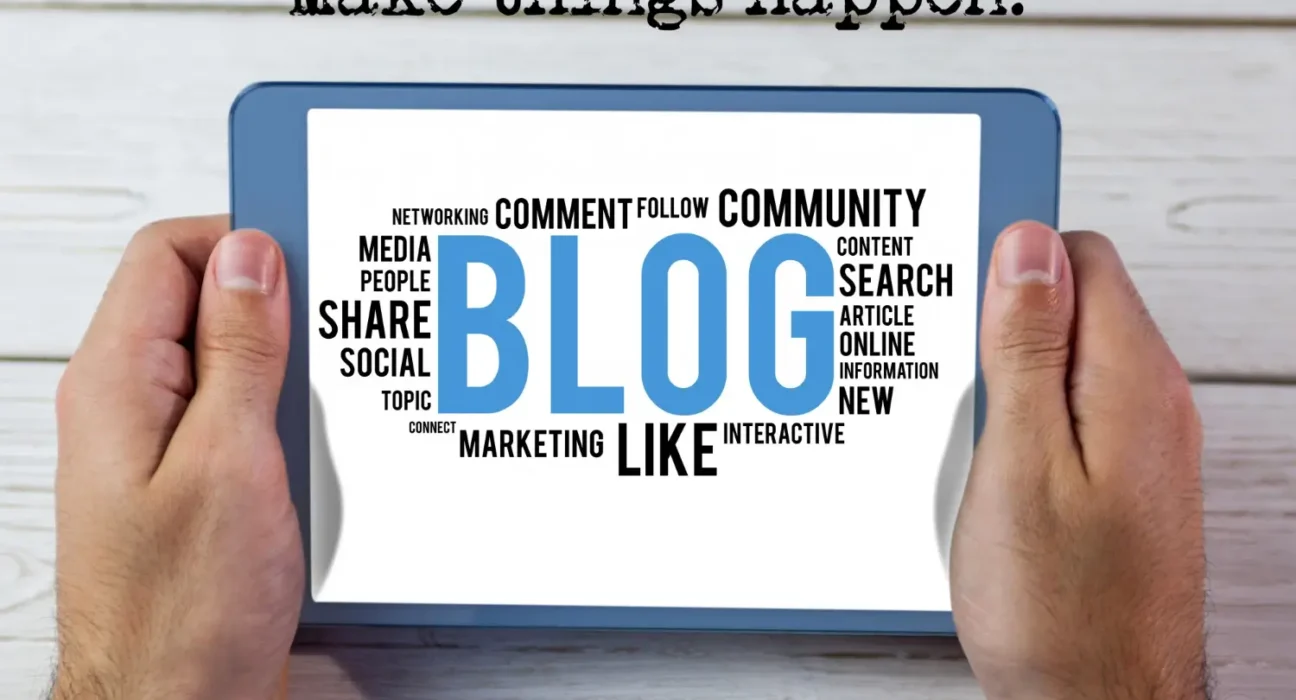
Knowing how to add social media links to your blog is a game-changer. It opens up a powerful way to boost blog engagement and encourage user interaction.
Table of Contents
These links act as pathways, linking your written content with lively social platforms where readers can dive in even further.
Why are Social Media Links Important for Blogs?
Here’s why you should consider adding social media links to your blog:
- Wider Reach: Social media links enable your content to reach larger audiences.
- More Interaction: Readers can easily share posts, bringing traffic back to your blog.
- Building a Community: Creates a sense of community as followers engage not only with the content but also with one another.
Why Connect With Readers Through Social Media?

Connecting with your audience through social platforms has its own set of advantages:
- Direct communication channels between you and your audience.
- Opportunities for real-time feedback and discussion.
- Potential for viral sharing, amplifying the reach of your content.
To make it easy for you to add these social media links, we’ve put together five simple steps:
- Choose a Social Media Icons Widget
- Create the Widget
- Get the Code
- Insert the Widget into Your Blog
- Check Your Blog’s Functionality
Each step is designed to simplify the process, making sure that your blog effectively connects with readers on various social networks. By following this guide, you’ll be able to enhance your blog’s visibility and build stronger connections with your audience.
Step 1: Choose a Social Media Icons Widget
Selecting the right social media icons widget is the first step towards elevating user interaction on your blog. A widget of this kind serves as a bridge, connecting your readers directly to your social media profiles. By doing so, it encourages engagement and helps foster a community around your content.
What is a Social Media Icons Widget?
A social media icons widget is a tool that displays interactive icons representing various social media platforms. These icons serve as clickable links that direct users to your respective social media pages. This element is essential for bloggers aiming to increase their reach and engage with their audience across different platforms.
Recommended Widgets
Choosing the right widget can make all the difference. Elfsight is a popular choice among bloggers for its versatility and ease of use. Here are some key features and benefits:
- Customizable Icons: Elfsight offers extensive customization options, allowing you to tailor the appearance of your icons to match your blog’s design.
- Multiple Platforms: Support for numerous social networks including Facebook, Twitter, Instagram, Pinterest, LinkedIn, and more.
- User-Friendly Interface: The platform provides an intuitive interface that makes it easy for even beginners to create and manage widgets.
- Responsive Design: Ensures that icons look great on both desktop and mobile devices.
Factors to Consider
When selecting a social media icons widget, several factors should be weighed:
- Customization Options: The ability to customize colors, sizes, shapes, and hover effects is crucial. This ensures that the icons seamlessly blend with your blog’s aesthetic.
- Compatibility: Ensure that the widget is compatible with your blogging platform. Whether you’re using WordPress, Blogger, Wix, or Squarespace, compatibility is key for smooth integration.
- Ease of Use: Look for widgets with straightforward interfaces that offer drag-and-drop features or visual editors.
- Performance Impact: Consider how the widget might affect load times. Opting for lightweight widgets can prevent any negative impact on your blog’s performance.
- Support and Updates: Choose widgets from providers who offer regular updates and customer support to address any issues swiftly.
By considering these aspects when choosing a social media icons widget, you set a solid foundation for enhancing user interaction on your blog. With tools like Elfsight at your disposal, creating an engaging and cohesive online presence becomes an achievable goal.
Step 2: Create the Widget
Creating your social media icons widget begins with a straightforward sign-up process. Here’s how you can get started:
1. Sign Up for the Service
- Visit the website of your chosen widget, such as Elfsight.
- Locate the sign-up option, often found in the top menu or as a prominent button on the homepage.
- Fill out the necessary information to create an account. This usually involves providing an email address and setting up a password.
2. Select and Create Your Widget
- Once registered, log into your account.
- Navigate to the dashboard and select the “Social Icons” widget from a list of available options. This is where you begin crafting your set of social media links.
3. Customization Options
- Customize your widget to match your blog’s aesthetic. Most services offer various customization options:
- Icon Shape and Size: Choose between circular, square, or custom shapes that align with your blog’s design philosophy.
- Color Scheme: Select colors that complement or contrast with your blog theme for visual harmony.
- Hover Effects: Add animations or color changes when users hover over icons to enhance interactivity.
4. Design Integration
- Ensure that your social media icons blend seamlessly with your overall blog design. Consistency is key here:
- Use similar color tones and styles across different elements on your blog.
- Keep icon sizes proportional to other visuals on your page to maintain balance.
- Aligning these elements creates a cohesive look that enhances user experience and maintains brand integrity.
5. Preview Your Design
- Before finalizing, preview how the icons look when integrated into a sample layout of your blog.
- Adjust any elements that seem out of place or disrupt the flow of your site’s design.
The customization phase empowers you to tailor every aspect of these icons, ensuring they don’t just serve a functional purpose but also elevate the aesthetic appeal of your blog. By aligning these icons with your existing design elements, you enhance user interaction while keeping the visual narrative consistent across all pages.
This step not only focuses on functionality but also emphasizes aesthetics to ensure that every visitor’s journey through your blog is both engaging and visually pleasing.
Step 3: Get the Code
Once you’ve customized your social media icons widget to perfectly align with your blog’s aesthetics, the next step involves generating the product code. This code is essential for embedding the widget onto your blog, ensuring seamless widget integration.
Generating the Embed Code
- Finalize Your Design: Ensure all design elements are finalized in the widget editor. Double-check that colors, sizes, and styles match your blog’s theme.
- Locate the Embed Code Option: Typically found in the dashboard of your widget provider (e.g., Elfsight), look for an option labeled ‘Embed’ or ‘Get Code’.
- Copy the Product Code: Click on this option, and a unique block of HTML or JavaScript code will be generated specifically for your widget.
- Review Instructions: Some providers offer additional instructions on how to properly integrate this code into various platforms, which can be helpful if you’re unfamiliar with HTML.
Common Issues and Troubleshooting
Encountering issues during this step can be frustrating, but they are often easily resolved:
- Code Not Displaying Correctly: Make sure you’ve copied the entire block of code without any omissions or additional spaces.
- Widget Not Updating: If changes aren’t reflecting on your blog, revisit the widget provider’s dashboard to ensure you’ve saved all customizations before generating the embed code.
- Compatibility Errors: Some blogging platforms might require specific adjustments in their settings to accommodate third-party widgets. Check platform-specific guides provided by your widget service.
If you face persistent issues, consult the help resources of your widget provider or reach out to their support team for direct assistance.
Understanding how to generate and troubleshoot the embed code effectively ensures a smooth process when adding social media links to your blog. This not only enhances user interaction but also supports an integrated online presence across multiple platforms.
Step 4: Insert the Widget into Your Blog
Integrating social media links into your blog is crucial for enhancing user interaction and connectivity. With your widget customized and code in hand, it’s time to place those dynamic icons on your blog. This step-by-step guide will help you insert the widget into your platform of choice, whether it’s Blogger, WordPress, Wix, or Squarespace.
Accessing the Blogger Dashboard
For Blogger users, placing social media icons involves accessing the dashboard and layout settings. Here’s how:
- Log in to your Blogger account.
- Navigate to the “Layout” section from the left-hand menu.
- Identify where you want your social media icons to appear — typically in a sidebar or footer for maximum visibility.
- Click “Add a Gadget” at your desired location.
- From the list of gadgets, select “HTML/JavaScript”.
- Paste the generated code from your widget provider into the gadget editor.
- Save your changes and preview your blog to ensure everything appears correctly.
Tips for Widget Placement
The placement of social media icons can significantly influence their effectiveness. Consider these tips:
- Prominent Locations: Place icons where they’re easily seen — headers, sidebars, or footers are ideal spots.
- Consistency with Design: Ensure that icon colors and styles blend harmoniously with your blog’s theme.
- Test Visibility: View your site on different devices to confirm visibility across desktops and mobile devices.
Integrating Social Media Links on Different Blogging Platforms
Each blogging platform offers unique tools for embedding widgets. Here’s how you can integrate social media links using HTML/JavaScript gadgets on popular platforms:
WordPress Integration
- Access your WordPress Dashboard.
- Go to Appearance > Widgets.
- Choose a widget area like a sidebar or footer.
- Select the “Custom HTML” widget and add it to your chosen area.
- Paste the code from your widget service into the content box.
- Click Save, then visit your site to ensure proper display.
Wix Setup
- Log in to Wix and open the website editor.
- Click on “Add (+)”, then choose “Embed”.
- Select “Embed a Widget”.
- In the settings panel, paste the copied code into the HTML box.
- Adjust placement by dragging the widget to a preferred area on your page.
Squarespace Configuration
- Open Squarespace and navigate to Pages.
- Choose a page where you want icons displayed and enter edit mode by selecting “Edit”.
- Click on an insert point (a small “+”), then choose “Code”.
- Enter the widget code in the Code Block that appears.
- Save changes and check alignment with other elements on the page.
Placing social media links effectively requires understanding each platform’s unique setup process while maintaining aesthetic coherence with your site’s design language.
By ensuring prominent placement of these icons, you not only promote connectivity but also enhance user engagement by making it easier for visitors to interact with you across various social platforms.
It’s essential to verify that these integrations function seamlessly within your blog’s overall layout — an aspect we’ll explore further as we delve into checking functionality post-installation next section
Step 5: Check Your Blog’s Functionality with Social Media Links
Ensuring that your social media links are fully functional on your blog is crucial. This step involves a thorough functionality check to confirm that the icons are visible and clickable, guiding visitors smoothly to your social media profiles.
Importance of Verifying Icon Visibility and Functionality
- User Experience: A seamless experience encourages visitors to connect with you on various platforms. If icons are not visible or clickable, it may deter engagement.
- Professionalism: Functional social media links reflect well on your blog’s overall presentation and professionalism.
- SEO Benefits: Properly functioning links can contribute to better SEO, as they enhance user interaction metrics like time spent on site.
Common Troubleshooting Tips
Sometimes, even after embedding the widget correctly, issues can arise. Here are some common troubleshooting tips to address potential problems:
- Ensure Correct Code Placement:
- Double-check that the generated code is embedded accurately within the HTML/JavaScript gadget section of your blog.
- Verify there are no accidental deletions or additional characters within the code.
- Inspect CSS Conflicts:
- Review your blog’s CSS settings to ensure there are no conflicts that might hide or misalign the icons.
- Use browser developer tools (like Chrome DevTools) for a quick inspection.
- Check Browser Compatibility:
- Test your blog across different browsers and devices. Some issues might only occur in specific environments.
- Clear cache and cookies if changes don’t appear immediately.
- If you’re using plugins, ensure they’re updated and compatible with your current blogging platform version.
- Disable other plugins temporarily to see if there’s a conflict affecting the widget display.
- Consult Widget Provider Support:
- Reach out to the support team of your widget provider for assistance if problems persist.
- Many providers offer FAQs or forums where similar issues may have been discussed.
Addressing these points ensures that any hurdles preventing smooth user interaction through social media links are effectively managed.
Additional Tips for Maintaining Active Social Media Links on Your Blog
Keeping your social media links fresh and relevant is crucial to maximizing engagement with your audience. Implementing some best practices can ensure that your blog remains a vibrant hub for interaction.
Regular Updates
- Update Links and Icons: It’s essential to regularly review the links and icons used in your widgets. Social media platforms frequently update their branding guidelines, which may require changes in icon appearance or link structures. Keeping these elements up-to-date ensures that users have a seamless experience when connecting with you.
- Reflect Changes in Social Media Strategy: As your social media strategy evolves, so should the links you showcase. For instance, if you’re focusing more on Instagram than Twitter this month, adjust the prominence of these icons accordingly to align with your current focus.
User Engagement Strategies
- Interactive Content: Beyond static icons, engage users by integrating dynamic content such as live feeds or social media walls directly on your blog. This creates a more interactive experience and encourages visitors to engage with your content.
- Promotions and Events: Utilize your social media channels for promotions or events that incentivize engagement. Hosting contests or giveaways linked through these platforms can drive traffic back to your blog and increase interaction.
- Regular Content Updates: Consistently updating your blog with fresh content gives readers a reason to follow you across different social platforms. Share snippets of new posts or behind-the-scenes content exclusively on social media to keep followers engaged.
By focusing on these strategies, you not only maintain active social media links but also enhance user interaction, driving more meaningful connections between your blog and its audience. This proactive approach keeps your blog dynamic and aligned with the ever-evolving nature of digital communication.
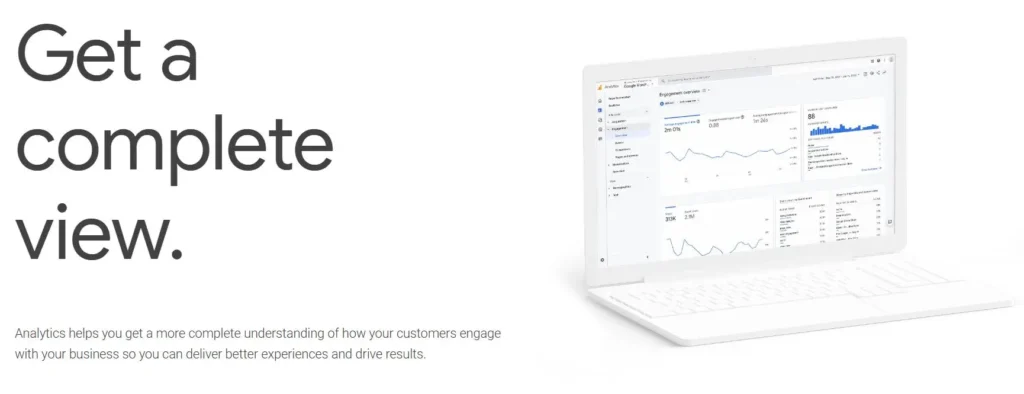
Using Analytics To Track User Engagement From Social Links On Your Blog
Incorporating analytics tracking into your blogging strategy can significantly enhance your understanding of user engagement. Tools like Google Analytics provide insights into the traffic coming from social media platforms such as Facebook and Twitter. This data is invaluable for determining how effectively your social media links drive visits and interactions on your blog.
Tools to Use for Tracking User Engagement
Here are some tools you can use to track user engagement from social links on your blog:
- Google Analytics: Set up campaign tracking to monitor clicks on your social media links. Use UTM parameters to distinguish between different sources and mediums, allowing you to track which platform generates the most traffic.
- Platform-Specific Features: Many blogging platforms, including WordPress, offer built-in analytics tools that provide detailed reports on visitor behavior. These features may include information on referral sources, helping you identify the impact of your social media presence.
Benefits of Using Analytics for Tracking User Engagement
Using these tools, bloggers can gain valuable insights into user behavior, identifying patterns and preferences. Understanding these metrics empowers you to refine your strategy, ensuring your social media efforts are aligned with audience interests and contribute positively to overall blog performance. Engaging with this data helps maintain an effective connection with readers through well-strategized social media interactions.
Conclusion: The Importance of Connecting with Your Audience through Social Media Links on Blogs and Encouraging Implementation of Learned Steps for Your Own Sites!
Creating a meaningful connection with your audience is crucial in today’s digital landscape. Active engagement through social media links on your blog plays a vital role in this process. These links do more than just promote your content—they foster a community around your brand.
Importance of Social Media Connection
- Wider Reach: Social media platforms have millions of users. By adding social media links to your blog, you tap into these networks, expanding your reach beyond the confines of traditional blog visitors.
- Enhanced Engagement: Interaction on social media is dynamic and immediate. Unlike static blog comments, social platforms offer real-time dialogue, allowing you to engage directly with your audience.
- Community Building: Social media provides a space for building communities around shared interests. Your blog readers can connect, share ideas, and become part of a larger conversation centered on your content or niche.
Promoting Posts and Building Communities
Utilizing social media links effectively means more than just promoting individual posts. It involves creating an environment where readers feel connected and valued. This fosters loyalty and encourages repeat visits to both your blog and your social profiles.
- Content Promotion: Regularly sharing blog updates on social media keeps your audience informed and engaged with new content. This continuous interaction can drive more traffic back to your site.
- Community Engagement: Encourage discussions, ask for feedback, or run polls and contests to keep the conversation alive. This not only promotes engagement but also provides valuable insights into what your audience values.
To maximize these benefits, ensure that the steps outlined in this guide are implemented thoughtfully across your own site. By embedding effective social media links, you enhance both user experience and the potential for organic growth through community-driven interactions.
FAQs (Frequently Asked Questions)
Why are social media links important for my blog?
Social media links enhance blog engagement and user interaction by allowing readers to connect with you on various platforms. This connection helps build a community around your content and promotes further engagement with your posts.
What is a social media icons widget?
A social media icons widget is a customizable tool that allows you to display icons linking to your social media profiles on your blog. It enhances user interaction by making it easy for visitors to follow or engage with you on social platforms.
How do I create my own social media icons widget?
To create your own widget, sign up for a service like Elfsight, customize the icon appearance to match your blog’s theme, and ensure that the design integrates well with your overall blog aesthetics for a cohesive look.
What should I do if my social media icons don’t appear after embedding them?
If your icons don’t appear, first verify that you’ve followed all embedding instructions correctly. Common troubleshooting tips include checking the HTML/JavaScript settings and ensuring compatibility with your blogging platform. If issues persist, consult support resources for the widget service you used.
How can I maintain active social media links on my blog?
To keep your social media links fresh and relevant, regularly update the links/icons in your widgets. Additionally, engage users through promotions or events that encourage interaction beyond just visible buttons on their screens.
Can I track user engagement from my social media links?
Yes, you can use tools like Google Analytics or built-in features from your blogging platform to monitor traffic coming from your social media links. This data helps you understand how effectively these links drive visits and engagement on your blog.